
Required utensils
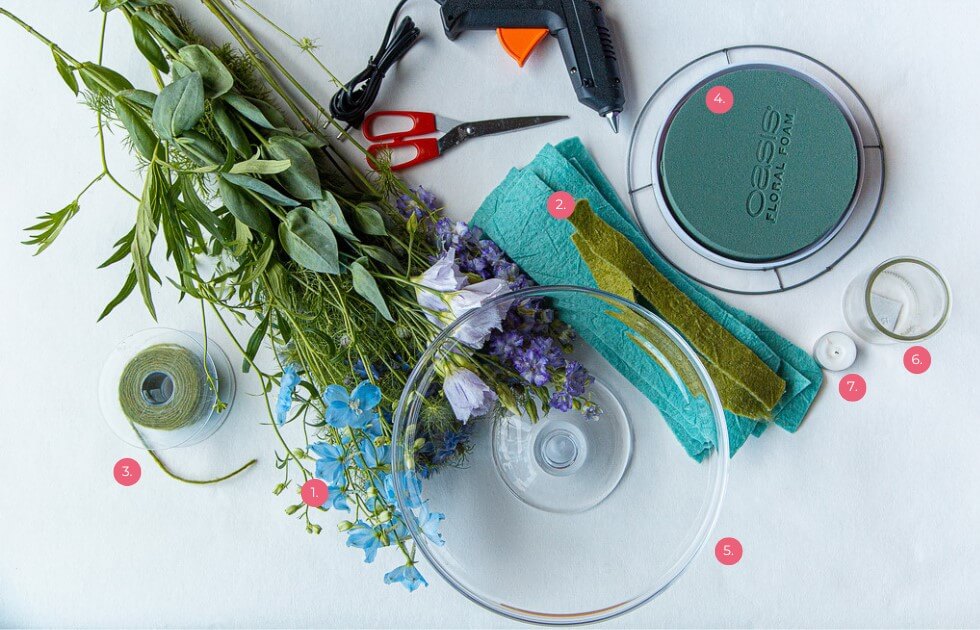
- Cut flowers and meadow flowers in various shades of blue such as delphinium, lisanthus, black cohosh, carnations, nolana etc.
- STYLIT sheep's wool felt "Crushed" in jade green and forest green
- STYLIT woollen cord "wicking thread" in moss green
- Sponge with metal ring
- Large glass bowl with foot
- Empty candle or jam jar
- Tea light
Tools: Hot glue gun and scissors
Materials and colours
moss green gu13
forest green gu69
jade green gu68
veillchenviolett
With the use of STYLIT sheep's wool felt "Crushed" in jade green and forest green and STYLIT woollen cord "wicking thread" in Moss green you create a harmonious interplay of colours and materials. The Jade green of the felt brings a calming and refreshing atmosphere to the room, while the forest green creates a natural and soothing mood. The moss green Wool cord "wick thread" rounds off the colour scheme perfectly and gives the lantern an organic touch.
With its simple flowers, the lantern brings a touch of Country feeling on the dining table, side table or window bench and brings a warm and cosy atmosphere into your home. Be inspired by nature and create a lantern with delicate meadow flowers with a harmonious felt border
Step by step
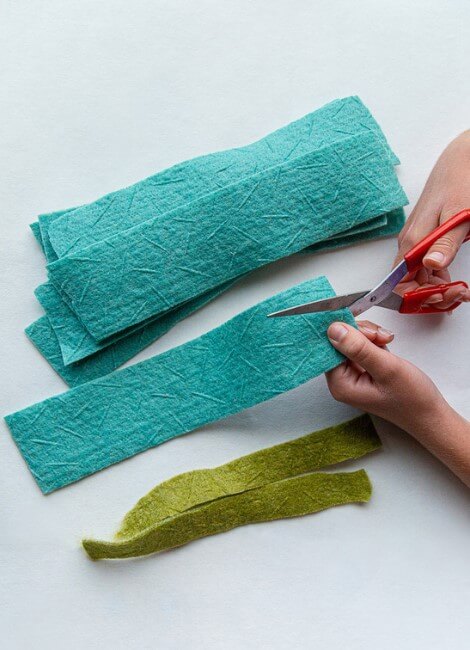
Step 1:
Cutting felt
First, cut the sheep's wool felt "Crushed", in the colours jade green and forest green, into long strips. These should be about two thumbs wide and between 30 and 40 cm long.
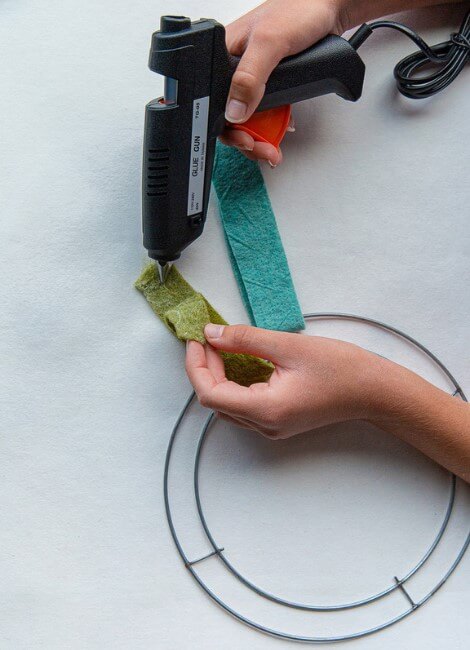
Step 2:
Attach to ring
Fold the felt strips in half and thread them through the metal ring. Then glue the strips together at the end. Keep doing this until the whole ring is wrapped in felt strips. Place the finished ring on the glass bowl.
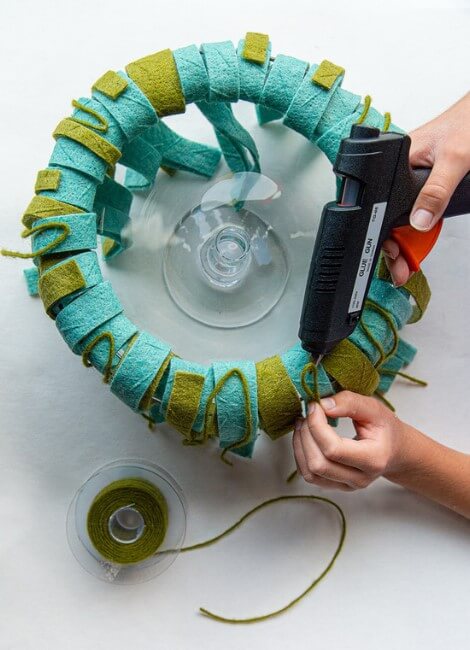
Step 3:
Embellish with cord
Take the wool cord "wick thread" and cut several threads, approx. 60cm. Then fold the threads in the centre and glue them to the felt strips around the ring using the hot glue gun.
Step 4:
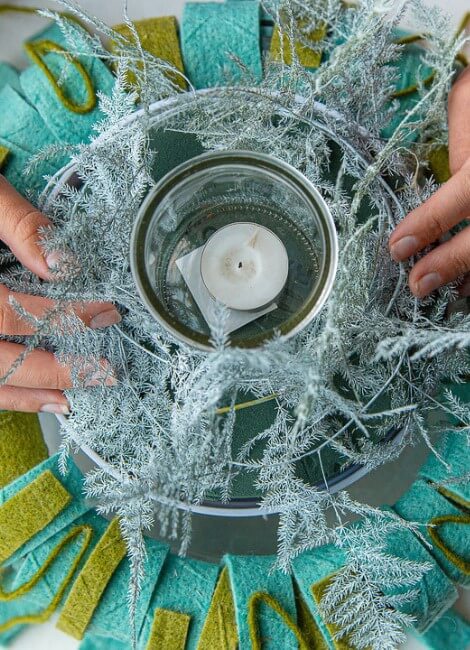
Let there be light
Now place the sponge in the centre of the bowl and place the empty candle jar with the tea light on the sponge. Place greenery of your choice around the glass in the sponge to give the arrangement volume and vibrancy.
Step 5:
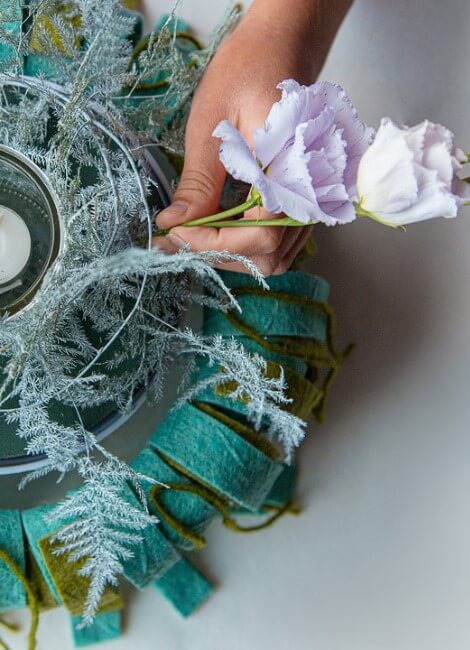
Draping flowers
Place the meadow and cut flowers all around the sponge. The arrangement should look loose and simple. The flowers and the binding greenery look simple, almost like a forest meadow. Ensure a good balance of light blue, violet and green

Step 6:
Done!
Your lantern is ready! Place it in a special place in your home or outside and turn it into a real eye-catcher. Enjoy the warm light of the candle, which shimmers through the "Crushed" sheep's wool felt and the "Wicking thread" wool cord and creates a cosy atmosphere.
How-to video
Designer

Florist Annick Mertens from Verrebroek in Belgium is a true master of floral design and captivates everyone with her creative arrangements.
"The materials of the STYLIT products all have a natural and soft look and this fits well with the emotions of my floral work. The colours of the collections combine well with twigs, moss and other natural materials. They make every piece simply unique."